Happy Thanksgiving!

I have a few things I wanted to share before tonight's feast, so even though, I didn't think I'd have time to get another post up, I had to make time to deliver you this menu:

THE TURKEY
Very simply put... I am thankful for the many people who have touched me this year.. including you! I am also thankful for many "things", milestones, events, and opportunities that have been woven into the fabric of my very being this year. Thank you, universe!

THE STUFFING
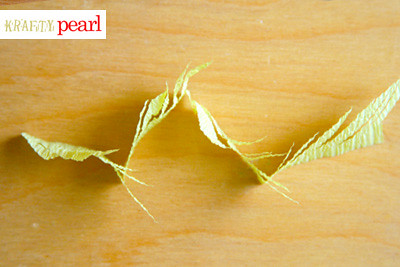
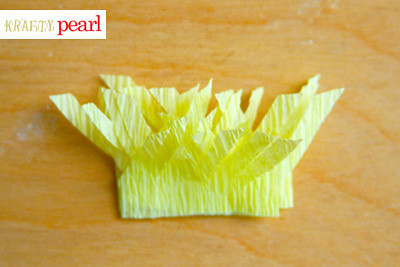
Among quite a few adventures and chances I've taken this year, all of which have been on my 2011 goals list, I am taking another one. I am taking on a part-time project to start my own Etsy shop to sell my handmade goodies and maybe even some coordinating supplies. Best of all about this shop is that 20% of annual sales will be donated to support the fight against cancer. This is a very serious cause to me for many reasons, so I look forward to launching it in the next two weeks and I ask that you stay tuned!

THE GRAVY
Thanksgiving in the States marks two very busy shopping days - Black Friday and Cyber Monday. This is also when the entire year's best discounts, prices, and sales can be found. I received a few emails and thought I'd pass the savings along to some of my favorite shops!

Two Peas in a Bucket is offering 20% off today through Monday.
Hambly is offering 35% off on Friday!

THE DESSERT
As always, I thank you for stopping by! Whether you're celebrating Thanksgiving or not, give the people you love a hug today!

{Hugs}
- KRAFTY pearl

On My Window Sill

It all started one March morning with the mourning dove coo, the sound of fluttering wings and twigs banging on my window and I knew spring was near. And a few days later, on my window sill was a nest with two eggs! I spied on them like a National Geographic bird watcher, peeking at them every morning and night. One morning, mama mourning dove actually flew away from the nest momentarily and that's when I had the rare chance to sneak this photo of the eggs.

Inspired by a few challenges this weekend, I finally got around to scrapping about it:

blog-onmwindowsill

Used: My Little Shoebox pattern papers, stamp, alpha stickers; Bazzill Basics cardstock; 2000 Plus custom stamp kit

When I saw the My Little Shoebox March sketch challenge, I knew it was perfect to feature one of my rarest spring sightings as the story. The sketch works out perfectly with how the quadrants lend to the look of a window with curtains. The embellishment cluster in the sketch is also a perfect place for me to show a whimsical re-creation of the birds building their happy, loving nest. It reminds me of this one scene in Cinderella where two birdies help tie a bow in her hair.

blog-onmwindowsilldetail1

I created the nest embellishment out of an old French-English dictionary page inspired by Cartwheels in My Mind weekend challenge where Cheryl challenged her readers to use a page torn from a book on at least 2 different projects in 2 ways. (My second project using a torn book page to come later this week, so stay tuned!) I then stitched the nest to the page with embroidery floss. I loved the way the nest turned out. Below's a little tutorial to make your own if you like it too! The eggs were hand cut to shape and dipped in glitter.

I also clipped out definitions for 'naissance' and 'nature' and hand-stitched it to the layout:

blog-onmwindowsilldetail2


Between handwriting my journaling or stamping it, I definitely appreciated Nichol Magouirk's Two Peas in a Bucket April scrapbook stamping challenge to stamp it. Stamped journaling: "My neighbors, two mourning doves, laid two eggs!" I absolutely love this custom stamp kit from Staples that's perfect for stamping two sizes of journaling. The shape of the journaling area was hand-cut using Fiskars fingertip knife, using a remnant diecut sheet as the shape template. The curtain trimming was created by cutting this EK Success Parisian border punch. Also used the same punch for the roof.

blog-onmwindowsilldetail3

And to wrap up this post, I have a very simple tutorial to making your own nest embellishment!

Step 1, all you need is a sharp pair of craft scissors and a strip of paper you want to use to make your nest. (The longer your strip, the fuller the nest.)
blog-nesttutorial1

Step 2, take the strip and snip off the opposing corners and make diagonal cuts along the top side of the strip leaving the paper intact to the bottom:
blog-nesttutorial2

Step 3, fold the strip into a zig zag pattern like so:
blog-nesttutorial3

And voila! You've got your self a nice nest embellishment:
blog-nesttutorial4

So whaddaya think? I hope you like!

Until the next post!
- KRAFTY pearl

Happy Friday!

A very happy Friday it is! How cool is this!? Two Peas in a Bucket gave me a shout out in their most recent weekly newsletter. Thanks for making my week, Two Peas! Woweee! (I know it's not a big deal to most, but it's very cool to a newbie like me!)

blog-twopeasnewsletter-snippet

Thanks, bestie, for pointing it out to me!

To end the week off, here's another layout. Equal parts tribute and thanks to my parents for being here for me 'every step of the way' using some of my favorite My Little Shoebox designs. My parents are my everyday inspiration and heroes, so this is for them:

blog1-everystepoftheway

Used: My Little Shoebox pattern papers, diecuts, stamps; Adirondack pigment ink; DMC embroidery floss; Reflections by Michael's pearl and rhinestone accents; Tim Holtz distress inks

Here's a closer look: I love journaling spot diecuts and diecuts in general because you can create so much with them. Here I cut out the journaling area to create a sunny flower frame around my photo:

blog1-everystepofthewaydetail2


I also love creating my own backgrounds by stamping and masking, and I can't get enough of these tabbed alpha stickers:

blog1-everystepofthewaydetail1


Thanks for looking! Until my next post!
-KRAFTY pearl

Le Petit Foyer

Lately, I've been learning to be a better blogger by taking clearer photos to go with blog posts, scheduling them on a weekly basis and of course staying extremely motivated to create things that will allow me to continue sharing layouts and ideas. So bear with me!

This week I'm sharing a layout I made about one of my fave places in my apartment, my foyer. It happens to meet two challenges on Two Peas. Check out the challenges or submit your layouts here: Studio Calico and Love Bug: Stitch a shape on your page.

About my foyer: it is a bit small and not at all fancy, but it's mine and I love it. Every time I come home, I'm greeted by some of my favorite photos on my bright sunny yellow Trollsta sideboard from Ikea and no matter how long my day was, it brings a smile to my face.


blog-studiocalicotwopeaschallengepearllui

Used in this layout: pattern papers from Studio Calico, Hambly Screen Prints; mist by Studio Calico's Mister Huey; stamps from Studio Calico, A Muse; bird rub-ons by Studio Calico; embroidery floss by DMC; and cardstock from Bazzill Basics and Close To My Heart.


Here's a closer look. Label pennants made by stitching Studio Calico stamped labels:
blog-studiocalico4


Hand written 'foyer' title embellished with Studio Calico rub-on birdies:
blog-studiocalico1


Journaling: 'Every time I walk into my apartment, I leave the rest of the world behind.'
blog-studiocalico2


Hand-stitched heart/paper piercing:
blog-studiocalico3

Hope you enjoyed my layout and the challenges from Two Peas!

By the way, I'm now on Pinterest and totally loving it. To the right of this post, you'll find all of my boards. Check them out and let me know if the pics inspire you the way they did for me!

- KRAFTY pearl

My Little Shoebox & Two Peas!

I love My Little Shoebox papers so I was happy to learn that Two Peas is running a MLS challenge and I thought, why not give the challenge a try! The Harmony collection reminded me of my small Momiji doll collection and inspired to create this layout, 'my sweet momiji collection'.

blog 1 - my sweet momiji full layout

Used in this layout: My Little Shoebox papers, cardstock, tag, and alphabet stickers. Martha Stewart punches and glitter. Fiskars trimmer and fingertip detail knife. Offray ribbon from Michael's.

Here's a closer look: I added glitter to the MLS tag to give it a pop of shimmer and dimension.

blog 3 - my sweet momiji top glitter details

By cutting down the height of some of the alphabet stickers, I gave it a less contrived and rigid look. I used Martha Stewart punches (love them) to create border strips and took the heart remnants to create a trail of hearts.

blog 2 - my sweet momiji top details

By stamping a polka dot background in a light pigment ink, I subtly lightened and added dimension to the paper. I also hand cut clouds and trimmed with light glitter.

blog 4 - my sweet momiji bottom details

So whaddaya think?

P.S. For too long, I have put off posting and sharing my layouts, so one of my goals for 2011 is just to share some of my work and ideas with the friends, family and other craft lovers like me, starting with this blog and my Two Peas gallery.

- KRAFTY pearl